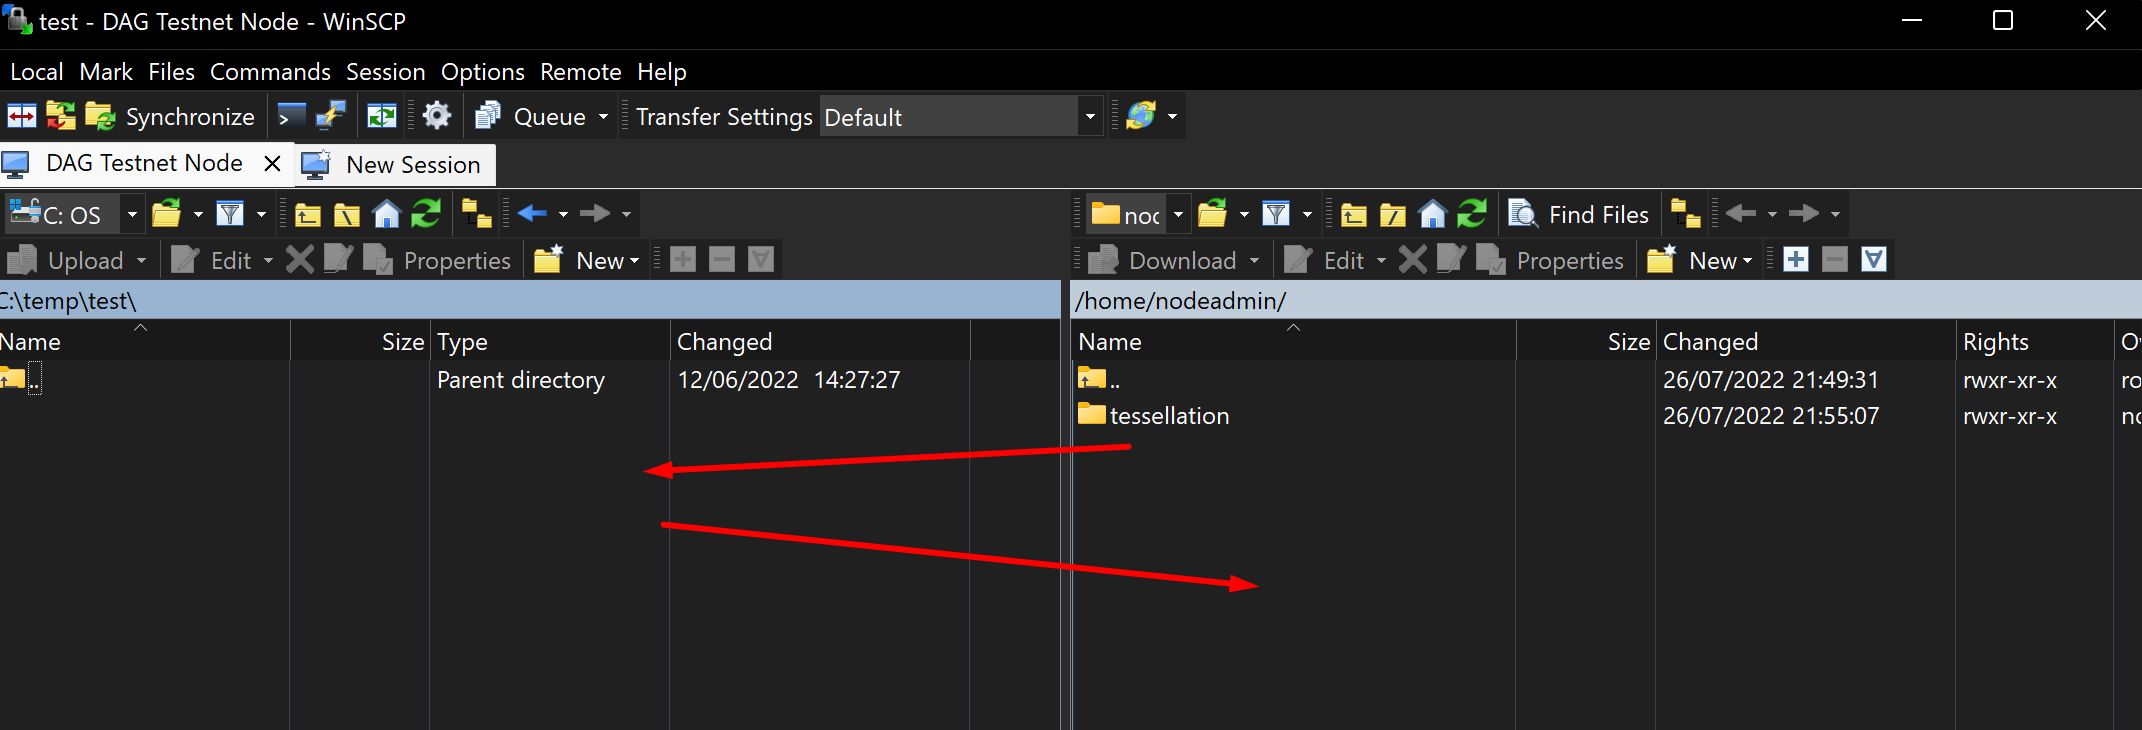
1. Install and configure your SFTP client
Already set up WinSCP with your node? Skip to section 2. Otherwise, have these at hand:
- Your SSH (PuTTY) private key and passphrase
- Your server IP address and SSH port (default: 22)
- The username you use to connect to your node
Step 1: install WinSCP.
Step 2: configure your node connection.
How to configure your node connection in WinSCP
When you first open WinSCP, it may detect your existing PuTTY sessions. If so, select your node session in the import prompt and click OK to import it, then skip ahead to section 2. If it doesn't prompt you, or you don't use PuTTY, follow these steps:
-
In the New Site window, fill in your node details:
- Host name: your node IP address.
- Port number: your SSH port (default: 22).
- User name: your node username.
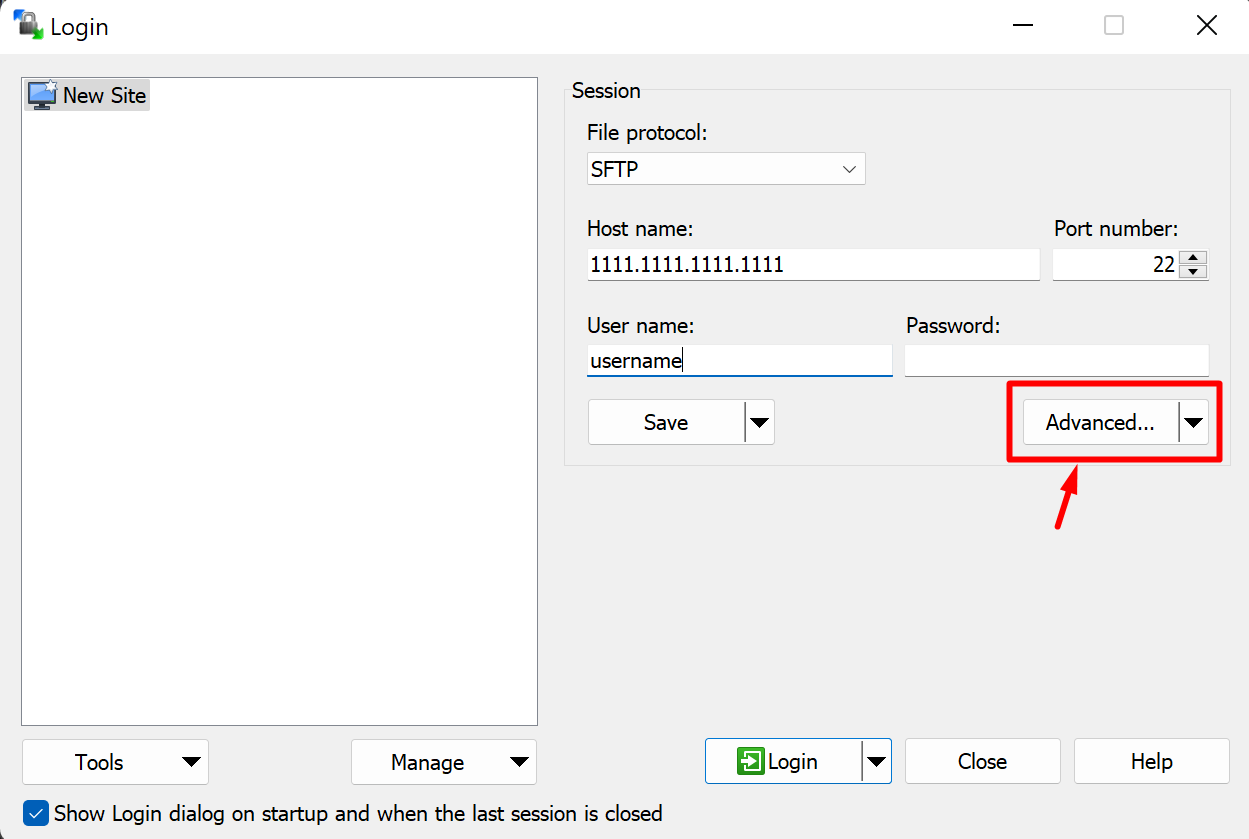
-
In the advanced settings, go to SSH > Authentication, click the highlighted button and select your PuTTY private key. Click OK when done.
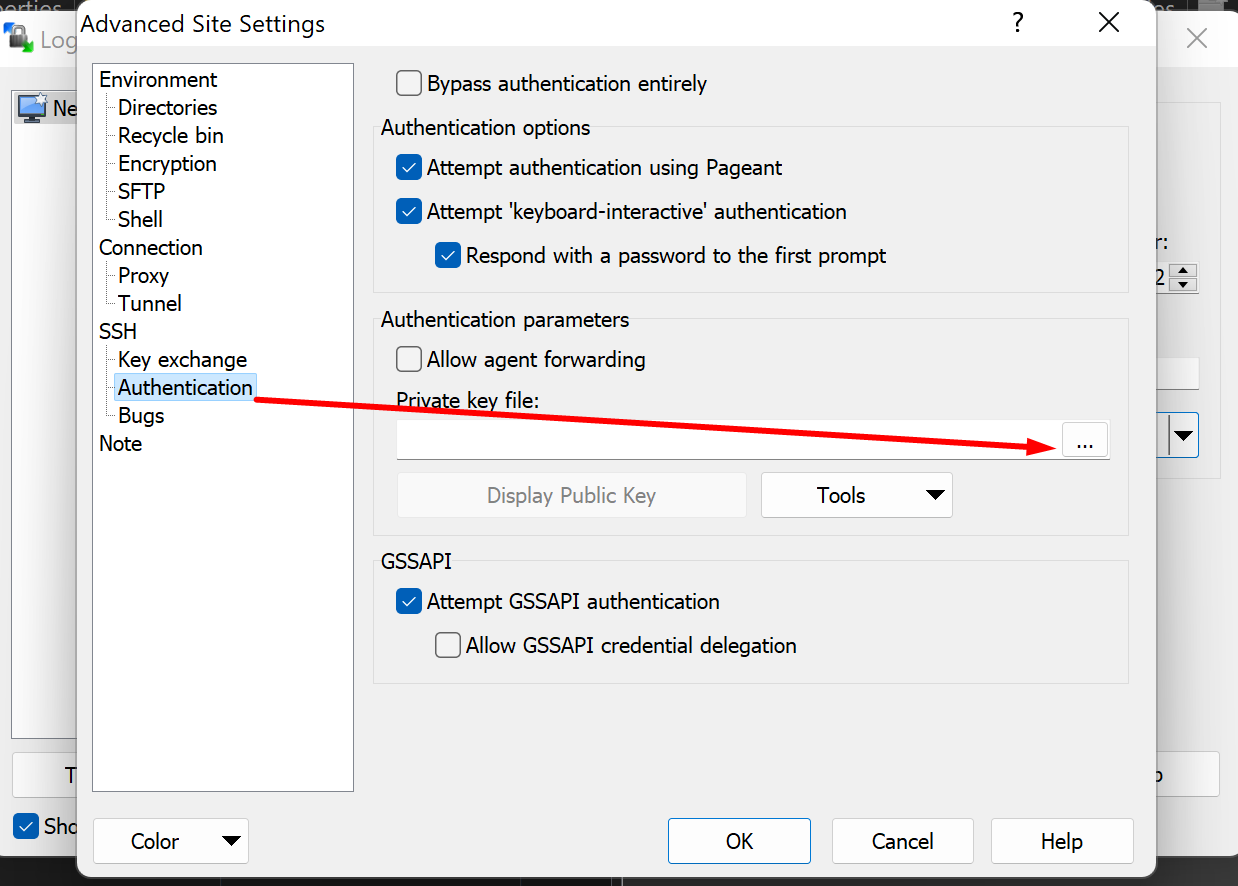
-
Click Save and give your site a name you'll recognise. Your host is now configured.
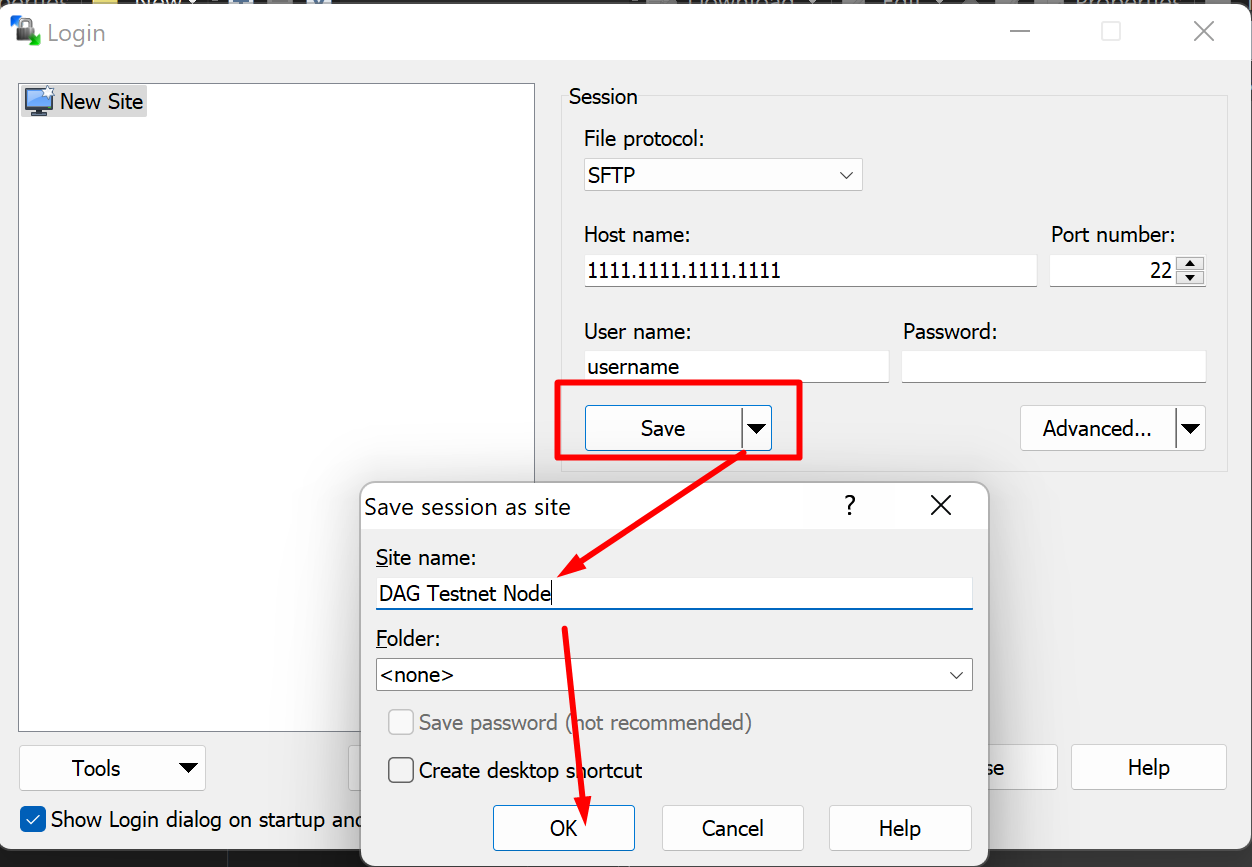
2. Transfer files with SFTP
Once your node connection is configured, follow these steps to transfer files from and to your server.
How to use WinSCP
-
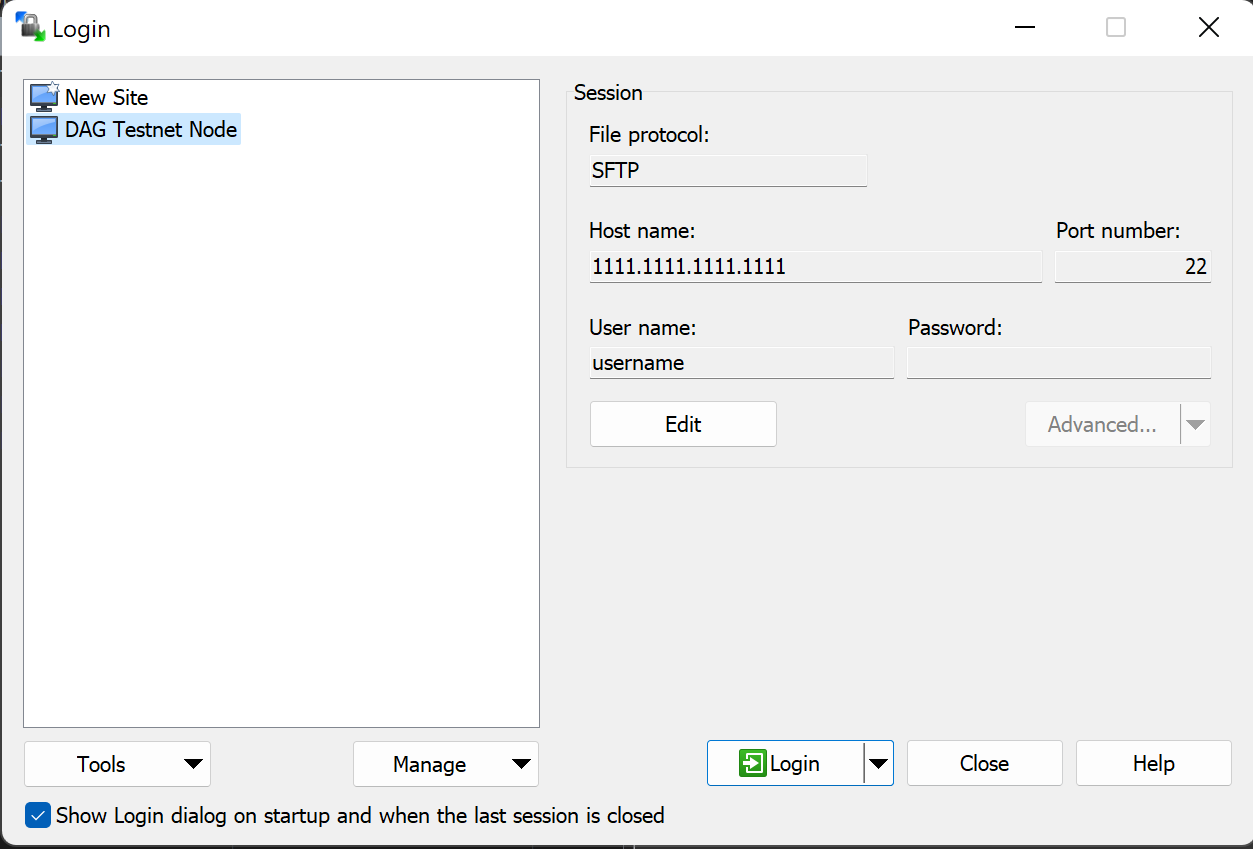
Open WinSCP, select your node connection on the left and click Login.
-
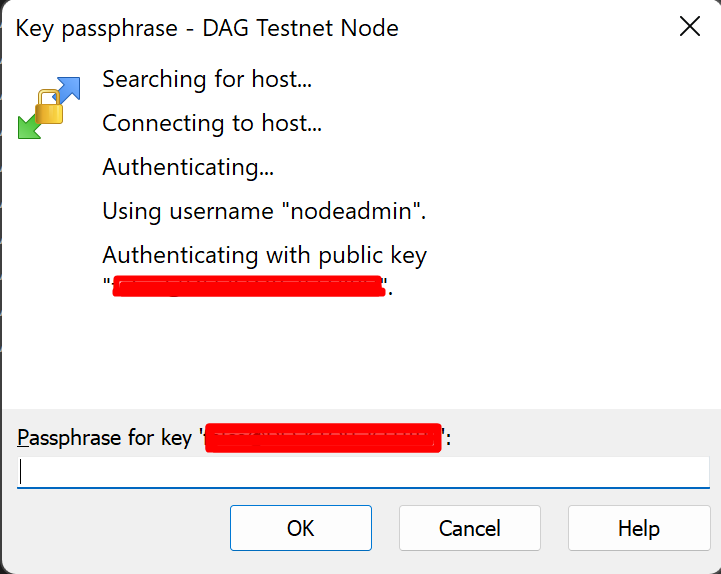
Enter your SSH key passphrase when prompted.
-
Your node's files appear in the right pane and your computer's folders in the left pane. To change the
local folder, right-click in the left pane and choose Go To > Open Directory/Bookmark.
Drag and drop files in either direction.